Tips for Using Telephoto Lens Landscape Photography
Landscape photography is frequently associated, or even equated, with the use of wide-angle lenses, however, this tin lead to formulaic compositions. Telephoto lenses may seem like the province of wildlife photography, merely alternating with them brings new artistic opportunities for mural photography.
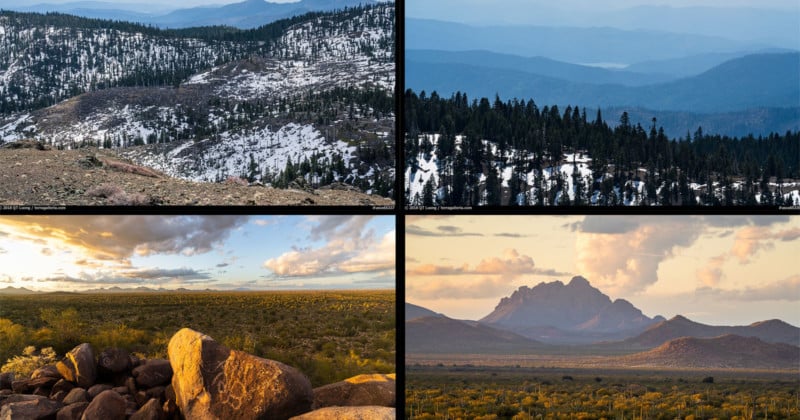
This is illustrated by the two opening images of my photobook Our National Monuments, compared to their wider counterparts.
For many years, I was heavily influenced by the near-far compositions of David Muench: a graphic and impactful foreground subject, with mountains in the background, all often beneath a dramatic sky. Photographers such as Galen Rowell would embrace that esthetic. His most used wide-angle lens was a 24mm, with the occasional 20mm, just since then the short stop of the 16-35mm lens has become a standard, with focal lengths of 14mm, and more recently 12mm fairly common at a wide cease of a zoom.
Broad-bending photography was i of the principal reasons I turned to a large-format photographic camera – which is severely express for telephoto lenses. There is much to be said for this approach. It helps identify the viewer into the scene, depicting everything that someone standing there may see, naturally creating a sense of depth. On the other paw, they shrink the backgrounds, for example diminishing the touch on of huge mountains and placing the emphasis on foreground elements that are more mutual than those mountains. If, in addition, you lot process them the same way, images tin finish upwardly all looking the same.
Telephoto lenses are heavier to behave and more challenging to use than wide-angle lenses. Compositions need to be more precise, every bit modest changes have greater effects. You have to wait harder for them, every bit they form but a minor portion of your field of view.
That latter signal is peradventure what makes telephoto landscape photography so compelling: when you choice up a pocket-sized portion of the scene, you lot direct the viewer to something that you found interesting but they may have missed. This makes those shots intrinsically personal.
A grouping of photographers standing at the same scene with a broad-bending lens is much more probable to produce similar images than if they were using a telephoto lens.
Even with close to 500 pages, packing 60+ national parks in my photobook Treasured Lands was such a challenge that almost each image had to represent a dissimilar location. Our National Monuments had more than room, and I could employ multiple images to stand for single locations. In two cases, I repeated images taken at the same time from the same viewpoint, looking in the same management and differing just by the selection of the focal length.
Instance #1: Our National Monuments Encompass
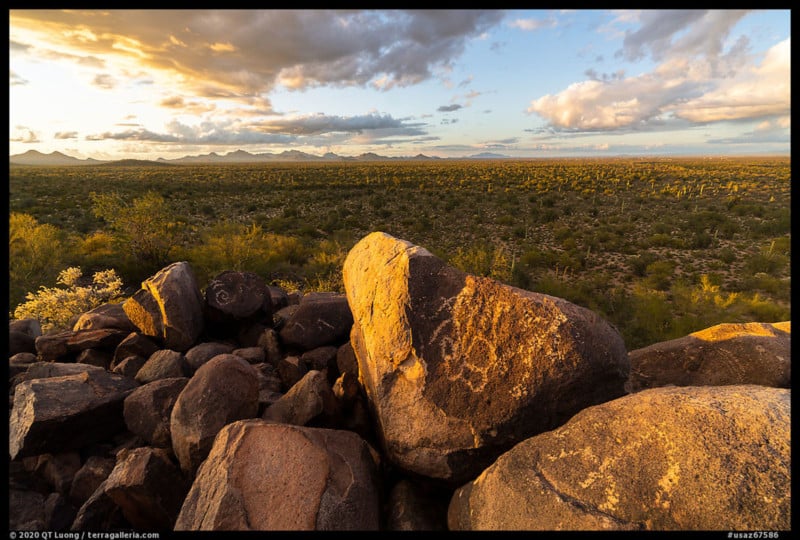
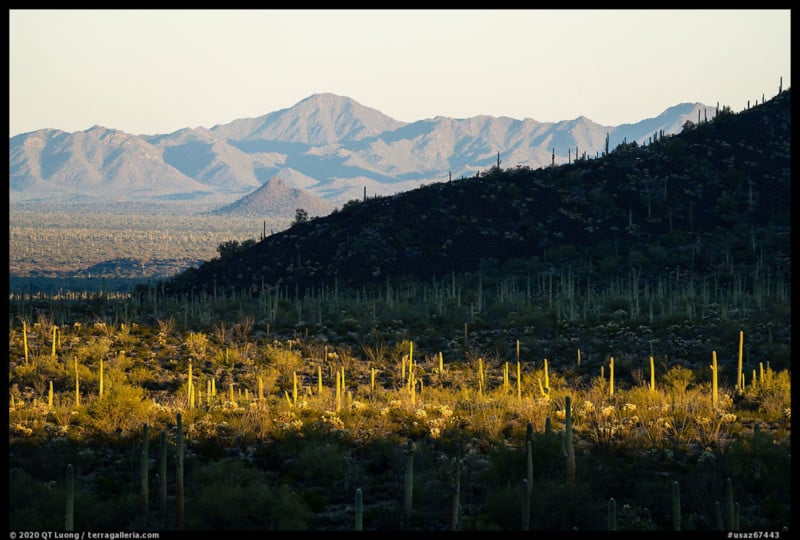
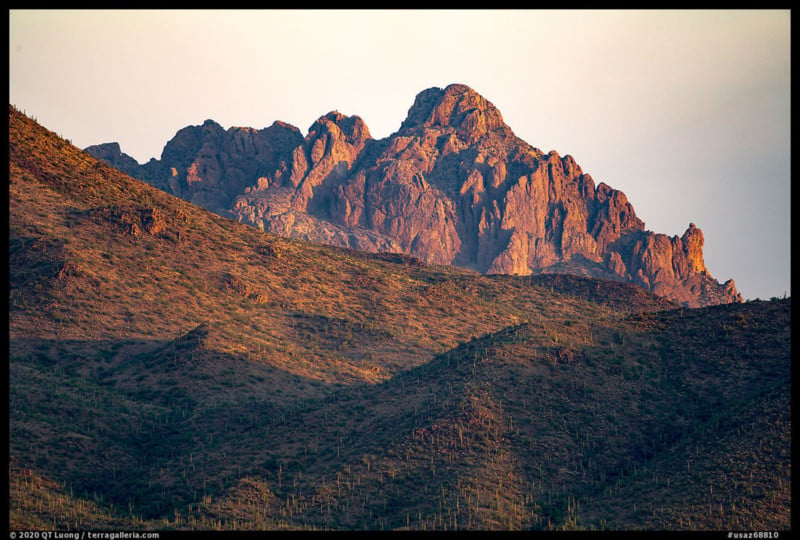
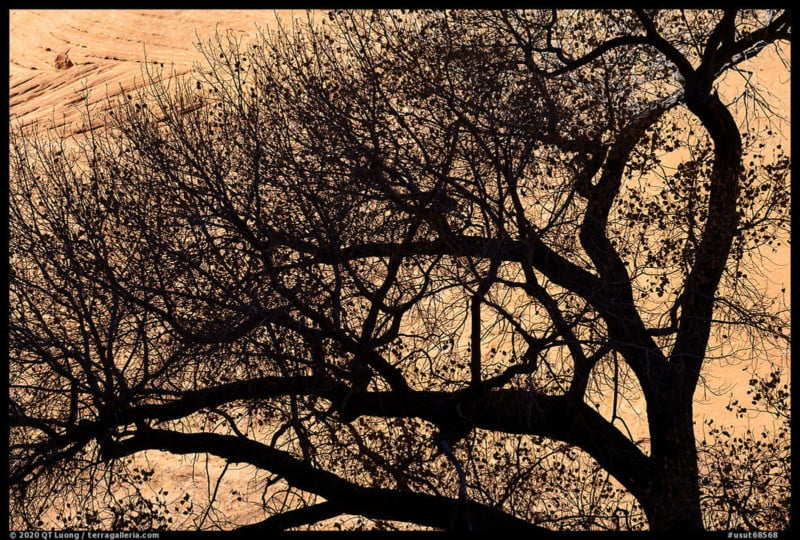
During the afternoon I spent at a petroglyph site in Ironwood Forest National Monument, as well close-ups of petroglyphs and flora, most of my compositions consisted of wide-angle photographs with etched rocks in the foreground. At dusk time, I made 1 more such photograph at the widest setting of my 16-35mm lens (page 247). The foreground includes the chief mountains in the monument, Silverish Bell and Ragged Top. However, beingness located more than 20 miles abroad and only almost 4,000 feet loftier, they appear tiny on the horizon.
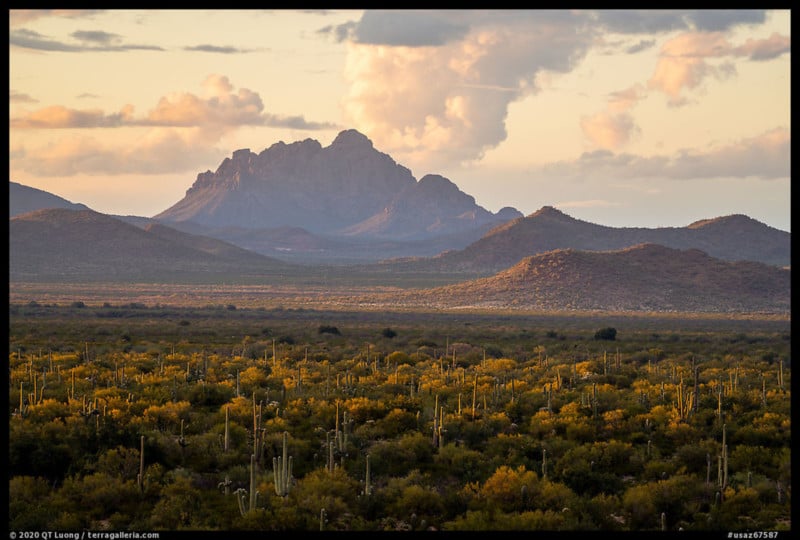
Considering of my sensation of that mountain, I notwithstanding noticed the distinctive contour of Ragged Top, the crown gem of Ironwood Wood National Monument. Between two wide-angle shots, I zoomed into the peak with the 100-400mm lens for a single shot at 340mm. Although the resulting image is merely a crop of the previous image, information technology is entirely different, carrying a sense of majesty rather than of space. The perspective looks natural plenty that without comparison, I doubtable you wouldn't have known it was fabricated with a super-telephoto lens. A bit of cropping enhanced the image'southward symmetry, making information technology an splendid comprehend epitome for Our National Monuments.
Example #2: Our National Monuments One-half-Title Page
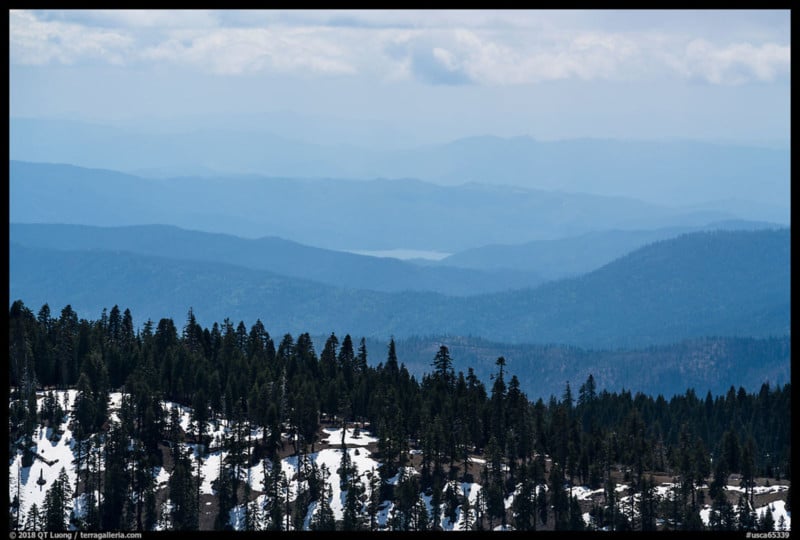
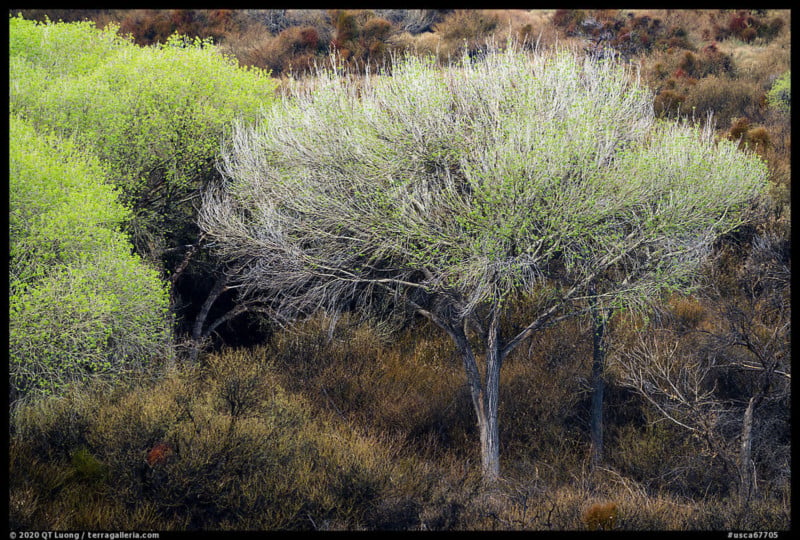
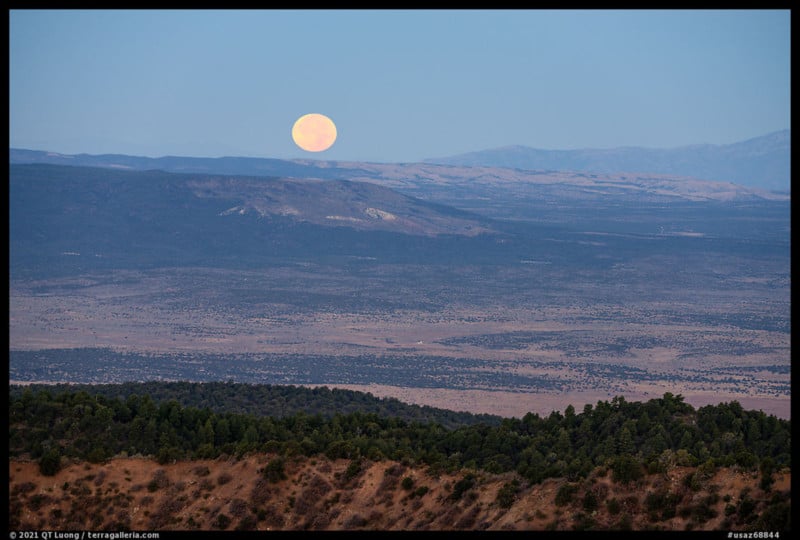
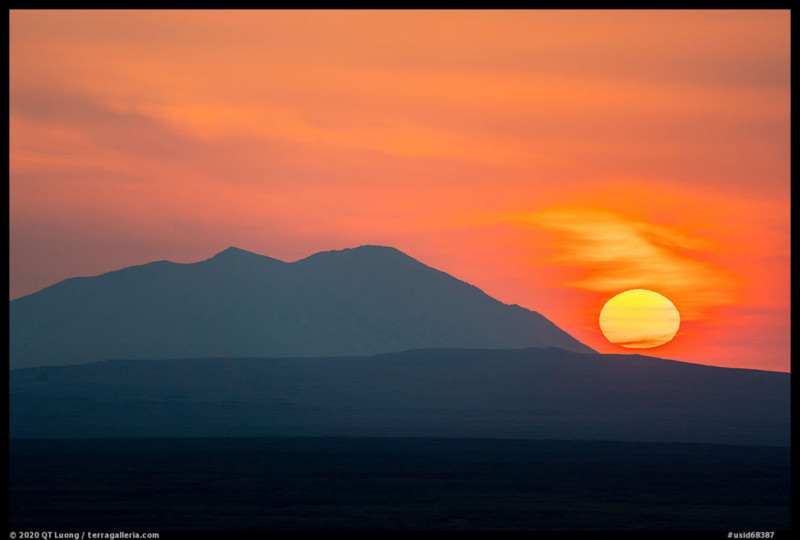
In Our National Monuments, there is a 2d pair of images where one is a crop of the other. They were photographed from the summit of Snow Mountain in Berryessa Snow Mountain National Monument. During my bound visit to the monument, the low-elevation hills were lush with an explosion of verdant grass and wildflowers. From the trailhead, it did not seem like Snow Mountain would live up to its name, but every bit I neared the pinnacle, I found a landscape still emerging from the wintertime. Photographing towards the due south let me include north-facing slopes with some snow.
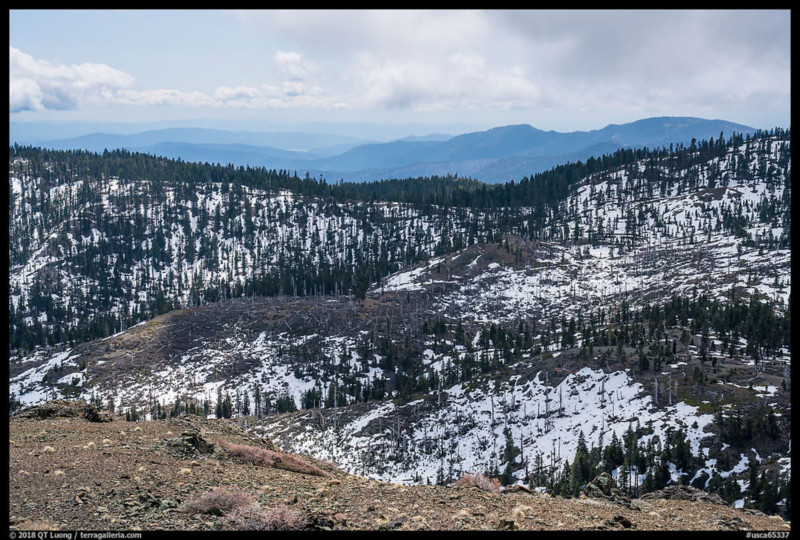
The comparison between this image (folio 83), and the post-obit is even more striking because the two focal lengths are not that different. The wide image was photographed at 54mm, which by today's mural photography standards is quite long, and the telephoto image was photographed at 240mm. The graphic quality of the latter made it a skillful choice for the half-title page, the first image inside the volume. One of the challenges with telephoto lenses is to create a sense of depth, as the perspective that helps create information technology with broad-angle images is now compressed. In this case, depth is created past atmospheric perspective, the drop off in warmth and dissimilarity occurring naturally with distance, and it would take been sick-advised to apply a "dehaze" correction.
Technical Challenges
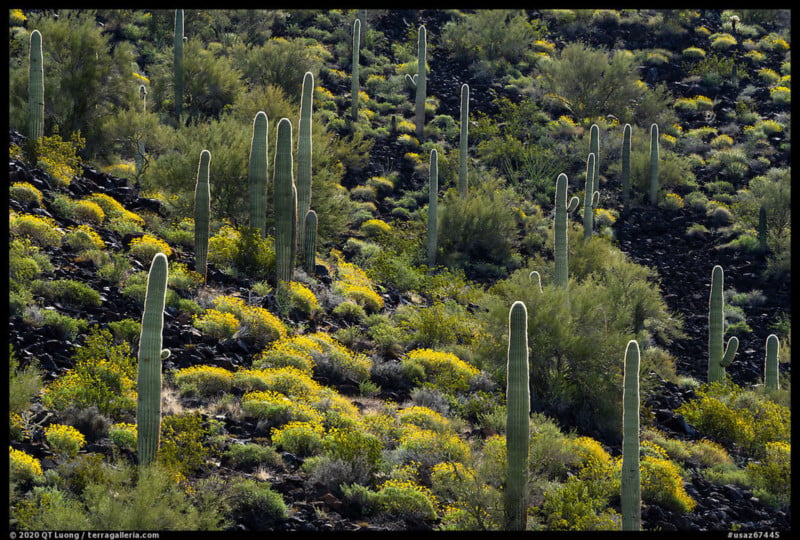
Hither's a technical detail that illustrates the depth of field issues with telephoto lenses. When I photographed the Ragged Summit image, I thought that the cactus in the foreground were far plenty that they would be subjects at infinity, like the mountains. I therefore used an discontinuity of f/8. On the Sony a7R 4, diffraction begins to limit sharpness afterwards f/6.7. On the LCD, the image looked sharp enough, merely when reviewing the epitome at 100% on a estimator screen, it turned out that the mount was a bit soft because of insufficient depth of field.
Applying Topaz Sharpen AI worked just necessitated doing it selectively, as the software over-sharpened the mountain crest. You'd think that the difference would not be noticeable on a ten×12 inch impress (the size of the book), and indeed the original image looks adequate, but my daughter was able to tell the difference betwixt two exam prints viewed side-past-side.
Using this Depth of Field calculator with the circle of confusion 10 microns advisable for the Sony a7R IV 61 MP total-frame sensor (2.5 times the pixel pitch 3.76 microns as explained here), we notice a hyperfocal distance of 1,450 meters for 340mm and f/8. The hyperfocal distance is the closest distance you can focus on and nonetheless have perfect infinity focus.
Read also: What is Hyperfocal Altitude and How Do Y'all Notice Information technology?
All this ways that in this case, to get perfect infinity focus, I would have had to focus shut to a mile away! Would stopping down to a sharpness-degrading f/22 have helped? The hyperfocal distance would nonetheless be over 800 meters, or half a mile.
Telephoto lenses can help you brand unlike landscape images, but they present many challenges. Not only exercise you take to pay more attention to compositions, but also they require a more careful technique. Equally we've merely seen, depth of field is limited, particularly so with high-resolution sensors, so focusing has to exist very precise, and even though the closest element may seem far at hundreds (or mayhap thousands) of feet away, avant-garde techniques could be necessary. Since they amplify the effects of vibration, even in a modest breeze getting a sharp image can accept quite a bit of piece of work.
Beneath are 13 practical tips in no particular order for overcoming this challenge. All images in the article were photographed with the Sony FE 100-400 lens for Our National Monuments, but not used in the book.
Tip #1. Check Sharpness
Shots can wait dandy at a glance on the LCD, but turn out unusable in print considering they were non abrupt enough. Checking the camera LCD at 100% magnification to see if your shot was precipitous before moving on to the next 1 is ever a good idea to prevent disappointments. That practice is all the more than important in telephoto photography because in that location are so many reasons why telephoto images may lack disquisitional sharpness. If you observe that images are not abrupt, so information technology is time for some of the adjustments described below.
Tip #2. Mind Focus and Depth of Field
I reason why information technology is more challenging to get sharp images with telephoto lenses is that the depth of field area is so much smaller than for normal and broad-angle lenses. Any imprecision in focusing shows upwards. Manual focusing at 100% magnification is the most reliable style to proceed, but if you use autofocus, simply sure to bank check if it is perfect.
For an indication of how narrow the depth of field area can exist, refer to the above example in which we saw that with a 340mm lens on the Sony a7R 4, even at f/22, the depth of field area including infinity starts one-half a mile away, pregnant that y'all cannot have any object closer to half a mile and infinity in perfect focus at the same time.
Tip #3. Consider Focus Stacking
At a longer focal length, getting a foreground and groundwork both in focus can be impossible. Stopping a lens downwardly to f/22 is non optimal because it results in degraded image quality due to diffraction. In addition, the requirement to apply a slow shutter speed makes the capture more vulnerable to vibration. A useful alternative is to merge exposures made with different focus points at f/11, a characteristic automatic past Photoshop.
Tip #4. Fourth dimension for Meliorate Air Clarity
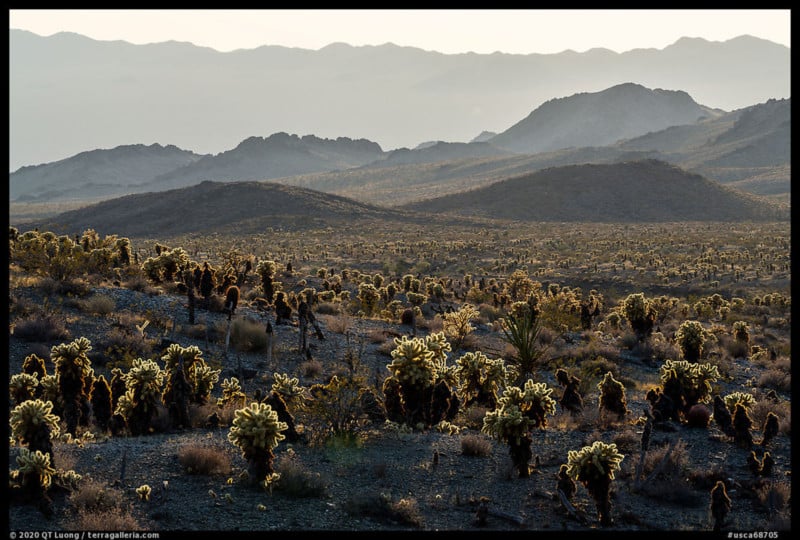
Air clarity is an overlooked issue with telephoto photography. Ofttimes with those compositions, even the closest subjects tin can be far enough that prototype degradation due to air quality is quite noticeable. On a hot afternoon in the desert, looking in the viewfinder of a telephoto lens, you lot can run across afar elements vibrating due to air convection.
Even in windless conditions, if yous accept a picture in those weather, nothing at a distance comes out sharp. In the cooler temperatures of the forenoon, the air is frequently more clear, and that is frequently the best time for telephoto piece of work. In addition, at dawn and sunset, when the sun is not out, haze is much reduced.
Tip #5. Apply a Polarizer
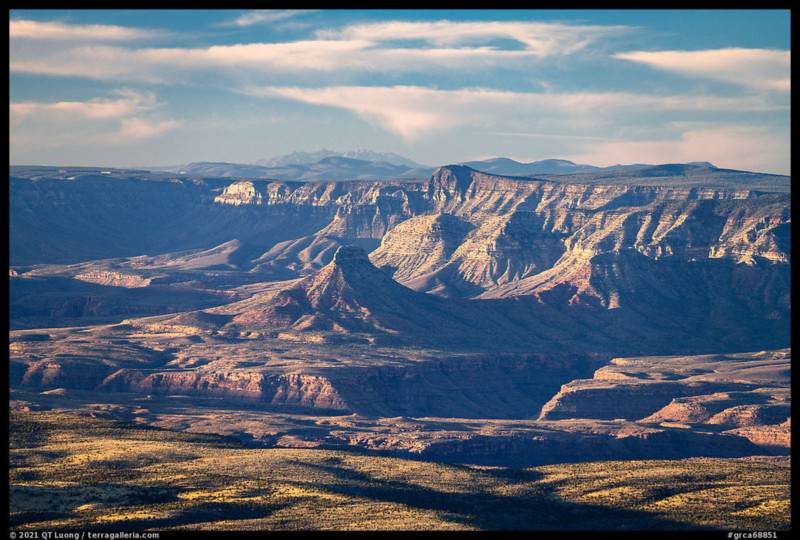
Haze consists of particles in the air that reflect lite, reducing contrast and desaturating colors. A polarizer makes the haze disappear because information technology cuts reflections. The more afar the subject, such as the South Rim of the One thousand Canyon from its Northwest rim, the more than haze there is, which makes a polarizer peculiarly useful for telephoto shots.
Tip #half dozen. Employ a Sturdy Tripod
The main reason for unsharp telephoto images is unwanted camera motility. Handholding a telephoto lens with successful results is hard. Those lenses are often large and heavy. Modest camera movements affect the composition. You need faster shutter speeds for precipitous images, with the general rule that y'all need an exposure time in seconds faster than 1/F, where F is the focal length in millimeters. This is difficult to attain in low light, peculiarly if you stop down and use a polarizing filter.
In the slightest of breezes, even a tripod that works fine for normal lenses is non enough to stabilize a telephoto lens. Typically, I utilize a series ii tripod and a medium-size ball head. However, that combination is often insufficient for a telephoto. On road trips, I pack a serial three tripod and a total-size ball caput. While I don't similar to hike too much with that setup, it works fine for roadside photography and brusk hikes. I take found it makes a significant departure for telephoto lenses.
Tip #seven. Apply a Tripod Collar
Tripod collars are often used on telephoto lenses to reduce the strain on the lens mountain acquired by a heavy lens with a long lever arm. That is a good plenty reason since the strain could event in long-term misalignment of the lens mount. The issue relevant to this article is that without a tripod collar, the offset of the heart of gravity degrades the stability, and the lever arm of wind pushing the lens is larger.
Near high-end telephoto lenses come up with a congenital-in tripod collar. Lesser telephoto lenses don't, merely yous can buy a third-party neckband for them. Once I added a tripod collar to the Sony 70-300, I noticed a higher success charge per unit, whereas before I ofttimes struggled to get sharp images. However, in terms of weight and bulk, the difference with the amend Sony 100-400 became minimal.
Tip #8. Stabilize the Tripod
Even though a lite tripod is not optimal for telephoto photography, sometimes that'southward all you got. Y'all can somehow get in into a heavier tripod. Many tripods come with a hook at the bottom of the center cavalcade or the platform, from which you lot tin can hang weights, such every bit your camera bag or a shopping pocketbook that y'all load with rocks.
Another related technique is to use downwardly pressure to your tripod. The easiest is to press on the pinnacle of your photographic camera with a hand, but you can also footstep with your anxiety into a strap attached to the center cavalcade or platform. Note that while those solutions address the lack of mass of the tripod, they don't address its lack of rigidity, hence the "somehow".
Tip #9. Use a Remote Release
Unless you use an extremely sturdy tripod, pressing the shutter will result in some photographic camera vibration. For normal lenses, with a self-timer delay of 5 seconds (just not ii seconds!) the vibration dies down enough, but in my feel, for telephotos, x seconds is more appropriate. The problem is that quite a bit can happen during those 10 seconds, including a gust of wind picking up. And at that place are those situations when the shot needs to be timed, for example for a wave. A remote release alleviates those issues.
Tip #x. Time for the Current of air
Telephoto lenses are especially sensitive to the wind because of their physical size and magnification. If y'all pay attention to the wind pattern, you'll observe that it is almost never uniform. There are gusts alternating with calmer periods. Try to release the shutter during a lull. It can take a lot of patience, but such lulls often happen.
Tip #11. Shelter from the Air current
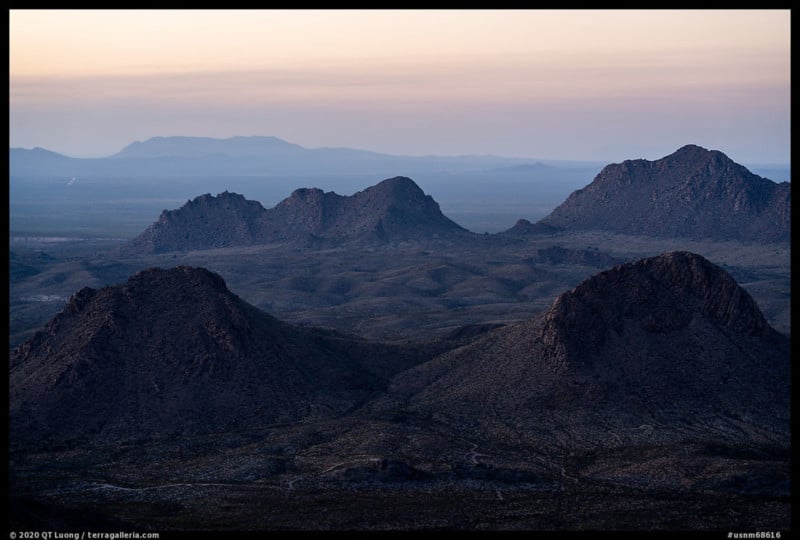
Not simply the wind is not uniformly distributed in fourth dimension, just the same besides applies in infinite. When I stepped up on the summit ridge of Dona Anna, the wind hit me with full force, simply by descending a few meters the downwind side of the superlative, I establish enough shelter to photograph at sunset. Even a tree can offering enough shelter.
Getting lower to the footing commonly results in lower air current speed, so merely lowering your tripod can aid, with the boosted benefit that a lower extension means higher rigidity. Too taking advantage of terrain configuration, you can shelter your camera with your body. Amid many other useful applications, an umbrella makes an excellent wind shelter. For roadside shots, I accept used my auto every bit a shelter, either past pointing it towards the wind and standing behind the rear hatch or even past shooting from a seat.
Tip #12. Crank Up ISO
If you lot are not able to get out of a stiff cakewalk, unless you have the beefiest tripod, there are ever going to be some vibrations. The shorter the shutter speed, the lesser their impact. Everything else being equal, yous can get shorter shutter speeds by increasing ISO. Increasing the ISO from base 100 to 400 in the daytime doesn't result in significant noise and loses only minimal particular, but it divides your exposure time by a factor of iv.
Tip #13. Take Multiple Exposures
In some situations, you may not have the fourth dimension to check at 100% magnification that the shots are sharp, maybe because in that location are quick changes non to be missed, such as the sun cresting to a higher place the horizon. That is a case where making redundant exposures tin be useful to increase the chance that you got a usable shot.
Virtually the author: QT Luong was the first to photograph all America'southward 62 National Parks — in large format. The opinions expressed in this commodity are solely those of the author. Luong was featured in the pic The National Parks: Americaʼs Best Idea past Ken Burns and Dayton Duncan. His photographs are extensively published and have been the field of study of big-format books including Treasured Lands (winner of ten national and international book awards), many newspaper and magazine feature manufactures, solo gallery and museum exhibits across the U.S. and abroad. You can detect more of his work on his website, Twitter, Instagram, and Facebook. This article was likewise published here and here.
0 Response to "Tips for Using Telephoto Lens Landscape Photography"
Post a Comment